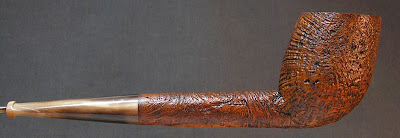
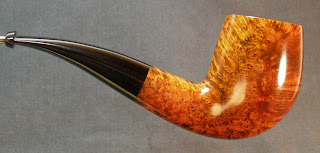
I got a new pipe for myself! (This is probably rarer for makers than collectors, LOL...) I'd been meaning to make myself a new one for a long time, and with the Christmas season coming up I decided to make myself a personal Christmas pipe, drilled to fit Savinelli 7mm balsa filters to mellow out some of the aromatic tobacs I end up smoking during the holidays to pacify the family at gatherings. Here's the pipe:
And yes, that is a dark green stain with a marbled green band attached to a faux-amber stem. Garish, I know, but I wanted Christmas-ey, festive, and fun. And it's nice just to have a new pipe to smoke, too - First in a while. I do like to make myself samples from my stock to live with for years, just to see how they perform and behave over the long haul. This one is another longterm test of this particular green stain's durability. The stem is the weird bit, though. When we bought the French biz, among the mountains of parts and pieces we got was a box full of diamond-shaped faux amber stems just like this. They're really beautiful and I'd love to use them on Ligne Bretagnes to sell, but I have not been able to because of their bizarre surface color problem. Well, pictures may explain better...
When I first found these stems I was all excited because I thought they were really beautiful, but when I went to sand and compound them, I quickly found they had a really strange characteristic - The exterior orange tint comes off! In the pic above, what you're seeing is the orange exterior coloring of the stem and the stem's face around the tenon is the pale white interior color, which becomes apparent the minute you do any sanding or firm compounding of the material, because the orange comes off like stain. It's very strange, and I've never encountered anything like it before. I don't know where the stems come from or how old they are, but the odds are, "very", so it's left me wondering if the color is an effect of oxidation on the stem exteriors over the years. Maybe they started off whitish and just yellowed on the surface with time. Because I can't imagine any manufacturer actually staining stems, and as it's some form of polyester resin cast, it would never penetrate anyway so its usefulness would be nil.
Weird.
My pipe's stem retains its color because all I did to it was flatten the end, drill the hole for the tenon and filter, and then *very* lightly clean buff the exterior, to avoid removing any of the color. This is fine for me but wouldn't be suitable for a pipe to sell, as it's got a number of fine scratches and surface ripples in it. Smokes great, and the color doesn't come off on my lips or in use, which makes me think oxidation of surface material is the answer.
News from the Pipemaking Workshop with the Funk.
Talbert Pipes Website - Kentucky Fried Popcorn - My Web Comic.
Tuesday, November 05, 2013
Sunday, October 20, 2013
Designing Halloween
Making one-of-a-kind pipes is not like designing repeatable shapes, where the design time is spread over many iterations and paid back piecemeal. With a one-of-a-kind, the design cost is a direct part of the total cost, and sometimes it can be a large chunk of the total creation time. I thought it might be interesting to write a post chronicling my entire experience of designing the latest Halloween pipe, from the initial commitment to the project to the final creation.
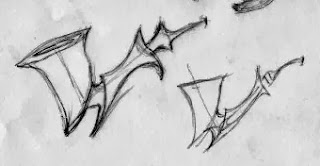
I started off with some very general sketches of a wide variety of subjects, but kept coming back to this sort of bowl shape. I fiddled around with this idea and produced the sketch at left, which was ok but not really what I wanted - It was much more Goblin than Talbert Halloween, at least as I wanted this year's run to be, and ultimately it became a new Goblin after various tweaks and changes. My problem with it was that it looked too overt and horror movie-ish, and my aim this year has been to make a set of Halloween pipes that were both surreal AND intense without resorting to the obvious prior tropes of claws, teeth, etc. So, while I liked this look, it got rejected, and I moved on to other ideas...
There followed a period of creative frustration as I sketched out idea after idea, playing with all sorts of curves and organic shapes as I searched for something that looked "right"... when I wasn't sure even what I wanted, just that I'd know it when I saw it. None of the above were "it", though I like a couple of them, particularly the lower right design, above, a weird combination of slug and scorpion.
I started thinking about layouts that were further from the traditional pipe design, and sketched out the pipe to the left, above. It's a cool looking thing though it would have some basic problems, like weight distribution and leakage around the stem from condensate flowing down... Still, an intriguing idea I may revisit someday. But it wasn't until I did the quick sketch of a Cavalier-style pipe, above right, that I suddenly said, "Yes, that's it."
But, of course, that wasn't "it", at least not yet - That was just the first step in pinning down what I wanted. I had a basic bowl and shank idea and I ran with it in more sketches, thinking in terms of a sort of "alien bone" look, with an elongated thin shank section and some sort of Calabash-style bowl perched at the end. I loved the design, but already I had a nagging at the back of my mind telling me this was going to be much harder to pull off than it might initially look...
This is a classic case of one of the main Pipemaker Problems - The imagination gets ahead of the function. I love the above designs, but they have all kinds of issues. The excessively long pointy bits would be fragile as hell, and prone to breakage. The airhole couldn't connect from mortise to bowl. The very curves that I liked played hell with the drilling angles internally. I did, however, really love the "Mad Scientist" feel of the design, and kept at it.
...BUT, not to the exclusion of other ideas. It's important not to get too fixated on one concept, especially one loaded with problems to surmount, so I sketched some other, similar themes as well:
The pipe on the right was a nice, straightforward expansion chamber design, but too simple, I thought, for a Halloween pipe - This was something for a regular Talbert Pipes stamp, perhaps a Signature piece but not a Halloween pipe. The one on the left, by contrast, looked plenty "Mad Scientist" but had drilling issues of its own, plus the potential hell of having to make a handcut churchwarden stem. 99% of all churchwarden stems you see on the market are molded, and here's why - Making a handcut churchwarden stem from rod stock is nastily expensive, for one, as it will take up the material of at least three normal stems. It's also hard-to-impossible to drill depending on length, because most lathe beds used by small shops aren't long enough to accommodate a long rod section and the extended length drill bit needed to drill the airhole. All that unsupported length wants to flop when spun and I don't have a lathe support for long stock. Then you have to shape and file the damn thing, which is 3X the work of any normal length stem plus the additional hell of making sure the full length is perfectly smooth linearly and not ripply or fluctuating in thickness. It's a major pain.
The problem was, my preferred idea was rife with issues too. The proportions of the design were going to require a HUGE briar block (seen in the faint outline) to allow the shape, and even with an extra-large block, the eventual pipe would seem a bit small - The two deciding factors were the top-to-tip distance from bowl rim to bottom point, and the point-to-point length of the shank section. That's a lot of briar. Ultimately unsatisfied with the shorter bowl heights possible, I looked into making it a component pipe of many pieces. In the sketch above, you can see some of my notes where I debated making the bowl-only from briar, and then fitting it via some sort of joiner to a shank section made from briar or meerschaum. I kept turning over material combinations and it kept getting more and more ridiculously complex, but none of the ideas I had got me around the fundamental problem of the layout, which was the expansion chamber. Since the bowl airhole and stem couldn't directly connect, it would need to be an expansion chamber design, which meant a large open shank section... completely at odds with the design's thin and delicate shank. The inward curvature of the shank meant a long, narrow expansion area and hard limits on how much "recurve" I could give the profile lines.
Frustrated again, I rethought.
The above-right sketch came first. What if the shank were compressed? That is, use the much-obsessed-over design but "squish" the shank inward, making it fatter instead of long and fragile. I liked the first sketch but it needed refinement, which it got in the above-left drawing. When I looked at that, I knew it was "it" - Something that looked appropriately "Mad Scientist-Insane" without resorting to fangs and skulls, yet was also a solidly practical layout with a large shank for the expansion chamber, good weight distribution, and compact proportions that would let me get a large bowl out of a single block of briar, making the thing all of one block.
I had a couple of minor changes - The stem was too large for any available rod stock diameter, and furthermore not even workable due to the curves I wanted in the shank section. I ditched the idea of a shank ring on grounds that the strength of the design was in the profile, and too many extraneous details would overcomplicate it fast. That led to the working layout below.
The bowl is a deep conical design with a centered airhole going down at an angle to open into the shank's expansion chamber. The chamber still needed to be narrower to accommodate the deep top and underside curves of the design, but it would be quite deep. The stem's tenon would socket into the expansion chamber drilling, with a larger cutout for the wider body of the stem itself. To the lower left you can see a crude top-down sketch - Always draw any design from multiple angles to see if it's going to have any major awkward elements that will hurt the theme. I was finally happy - It solved every issue of the original "Version 1.0", with thicker "pointy bits" (and thus more durable), as well as a bigger chamber, a taller bowl, and a somewhat more aggressive stance.
And that's how I got to this!
Saturday, October 12, 2013
Make a Billiard
Here's a little pop psychology help - Some thoughts on motivation and mood, if you will. It's October here, and that means it's time to make Talbert Halloween Pipes. This is a high stress, high concentration task that requires a lot of focus and confidence and a good clear pipeline to the creative part of the brain. I've done creative work for long enough that I can usually slip fairly easily into "the mode" when required, but something unusual happened this time around and I thought I'd write down just how I dealt with it in the context of being a working creative professional, in case it might be of help to others.
In a nutshell, my philosophy can be summed up as, "Make a billiard."
The reason I 'm writing this is because at the start of this month, we had to have our 19 year old cat Loki put down. Loki has been with Emily and myself for nearly our entire married life; she was one of the family. Lately her age had really been hitting her hard and a number of health issues were manifesting in faster and faster succession. Finally, right at the start of October, Loki had what could only be described as a Very Bad Morning and the decision had to be made.
(At left, Loki does what 95 year olds do a lot of the time...)
Em and I were both pretty upset by the whole experience, as you can probably imagine. Having to hold and console your near-20 year companion as the vet gives her the lethal injection is not a life event I would wish on others. So we came home and sat around despondent for a couple of days. However, we're self-employed, and when we're not working, we're falling behind - No guaranteed paychecks here, so one has to develop emotional coping mechanisms to handle these sorts of bumps in life. Because frankly, when I'm really down about something, the last thing I feel like doing is going out into the workshop and pouring lots of creativity into an enjoyable project. It's a Catch-22 - I do my best work when I'm enthused and feeling creative, yet I have to work to keep the grocery bills paid.
The result is my simple fall-back rule - Make a billiard (and yes, I know the pipe pictured above is not a proper billiard... Away with you, pedants!). I'm a big believer in Cognitive Behavioral Therapy, which is a fancy way of saying that if you're depressed, go do something positive and before long, you'll change your own mood. Stewing doesn't help, sulking doesn't help, brooding doesn't help - For me, the answer has always been, do something. While I might not be in the right frame of mind to sit down and produce some sort of artistic creation, what I can do is follow rules and do technical work.
Billiards don't require creativity.
Billiards have set parameters. They don't need emotion poured into them.
A billiard is a guarantee, like a promise of morning - Follow the rules, make the shape, and if you get the technical stuff right you'll have a good looking pipe.
And the magical thing is what follows, which is - I sit back, I look at it, and I have concrete proof right there in hand that I've made something. Instead of sitting and feeling sad and unmotivated, I've produced something positive that's going to make someone, somewhere, happy. Call it an affirmation of life, if you will - The root premise of Cognitive Therapy is that even if you're not feeling it, you do positive things and your brain will eventually pick up on these constructive routines of thinking and slip back into a more positive outlook. I make, therefore I am happy. (I'm a pretty simple guy, really)
And then before I knew it, I had the pipe at left. It's the sort of pipe I can make in my sleep now, but it was something I could sit back and look at and be satisfied by, and somewhere in that process the raw shock of our loss turned into natural, healthy grief that I could let go of, and it wasn't long before I was eager to get back into the shop and work on an especially intriguing new Halloween Pipe design that I'd sketched out.
So, that's what I have to offer to readers - If you're feeling down, make something. Do something constructive. Don't just sit, go mow your neighbor's lawn or organize your attic or repaint your kitchen. In short, don't stew, do.
Make a billiard.
Thursday, April 25, 2013
Keyboard Wars!
Keyboard wars! Yes, I know this has nothing to do with pipes, but one of the reasons I haven't been updating the pipe blog as much in recent times is because I've written just about everything I can think of to write. I try to avoid rambling on about the same things over and over again so as a result, the blog has gotten quieter. However, this may not last, as I'm contemplating opening the theme a bit (or more than a bit) to include, well… Whatever I feel like writing about at the time, be it current events, politics, computers, gadgets, or more.
My love affair with the mechanical keyboard is a topic near and dear to my heart. You have to be of a certain age to remember mechanical keyboards, and the fact that I'm compelled to explain them is indicative of how much they've fallen off the map in recent years in favor of the quiet, membrane-style keyboards that ship with modern computers. These membrane keyboards work on rubber domes - Essentially, the key press squishes a quiet little rubber switch that's responsible for registering a key press. Benefits of this are mainly confined to noise - Rubber membrane keyboards are nearly silent. The downsides are several - The rubber domes wear, they don't have a distinct positive "click" for each press, they get squishy, and the typing output produced is less distinct and accurate. *Sometimes* you get your letter, sometimes you don't. By contrast, old-style mechanical keyboards have an actual hardware switch under each key that clicks when pressed, providing an immediate clarification that you've typed what you wanted to.
Now, I do a LOT of writing. I write descriptive copy for my own website, I reply to business emails, I write two blogs, and I write a web comic… On top of maintaining and making interesting our business Facebook page, G+ page, and keeping active in the several online forums I frequent. I've worn out keyboards by deforming popular keys through constant use - My old Enter key looked like a sway-backed horse in the middle where the plastic had warped. It's in service to this writing passion, and heavy writing demand, that I started looking for a better keyboard option.
I missed REAL KEYS. Large, heavy, blocky keys instead of the flat key styles popular with Apple these days, which I find terribly frustrating to use due to the number of key presses I miss with them. This led me to investigate the mechanical keyboards available today, and for the Mac there are only two real options, the Matias keyboard and the Das Keyboard. Both use mechanical switches, both are clacky and loud, both are heavy duty, and I decided it was well past time to upgrade to one of these things. But which to choose? I couldn't decide, and as this would be a very longterm business partner for me, I chose to order one of each and compare them directly, and return the loser.
Here they are, freshly arrived. Sexy, sexy keyboards:
The packaging is remarkably similar on each, and I'll not go into it here as I'm not a packaging fetishist - I'm interested in the meat, not the wrapping. My first impressions were as follows:
The Matias Quiet Pro is just that, quiet. The key feel is good, the keys are clearly labeled, it runs off a single USB plug yet offers extra USB ports for three more devices, and the keys are each labeled not just with their letter, but also with the special characters they can create - An extra handy wonder to me, as Mac shortcuts often leave me baffled when I see them in print (Seriously, who would ever immediately recognize something like ˆ¶–√ ?) I'd have liked to have gotten the Matias Pro but it has white keys, and that doesn't work for people who spend most of their day in a dirty woodworking shop. The Quiet Pro is still louder than my stock Apple keyboard but much quieter to type on than other mechanical keyboards.
So… Black keys, great labeling, extra function keys, USB overload… What's not to like? Well, the downsides for me are two - That selfsame keyboard labeling that puts all the extra symbols on the keys makes reading them at a glance to be a challenge. I'm not a touch typist and I often need to glance down as I'm clicking away, and what I see when I do is a dizzying spread of tiny little white marks. The other demerit, and it's a bigger one, is in "look and feel" - For a $160 keyboard, the Matias feels very $45 aftermarket Staples house brand. The frame is a creaky, twisty piece of silver budget plastic and the whole thing looks a bit low rent… Not what you want after spending this much cash on something as esoteric as a keyboard.
The Das Kayboard, by contrast, is the black Mercedes of the pair - It looks every inch its $130 price tag. The opaque black housing vanishes seamlessly into my black desktop and it's a glossy surface with some nice heft to it. Despite the nicer appearance, I was biased against the Das initially due to several annoying factors. The makers have elected, for inexplicable reasons, to make the key lettering lower case, so where the Matias presents one with a chaos of markings, the Das gives you a squinty, stylized lettering display that takes some getting used to. Also, it demands two USB connections, one for itself and one for its two powered USB ports. It's nice that the Das can actually charge USB devices that need powered connections, but who really charges their iPod from their keyboard? Finally, and most annoying of all, the Das swaps the function of the media control keys such that one has to press FN to make them work. This is small and yet insanely annoying for someone like myself who uses Apple's media shortcut keys a great deal, always pausing music or adjusting volume. The Apple layout wasn't broken, and didn't need fixing.
So, with all those negatives, why do I find myself merely liking the Matias and actively lusting over the Das? It's all in the feel - The Das's key switches click like precision instruments and every key touch is a joy. It feels, in short, like a real typing machine; something I haven't had in at least 15+ years. Sitting at the Das and listening to the singing clickety-clack of the keys is pure bliss. One feels like a journalist, a real reporter, a writer… Like one should be cranking out blistering exposes of corruption in high places, or serious novels to tear at the heart. It's romantic, pure and simple, and the Das has it in spades over the Matias. The muted keys of the Quiet Pro just aren’t quite as exact in feel as those of the Das - There’s more wander to each touch and I have to make a point to type harder to be sure that I’m not skipping letters with soft taps. It does beat the Das in one respect, however - Key squeak. I’ve found that continuous typing on the Das tends to produce some aggravating key squeaking that resonates on a fingernail-vibrating level. The Das Keyboard website includes a help video describing how to grease squeaky keys, but this did little for me - A day later and they were back to the same chirpy cries.
Is the Matias bad? No, not at all. It's an excellent tool, and when I finally have to choose between the two, I suspect I will pick it despite my Das lust. The Matias chunks along happily, its key presses quiet and slightly hefty in feel in contrast to the Das's Singer sewing machine clicks. They're both good products. For practicality, features, layout and ease of use, buy the Matias. For a love affair with an amazing machine that demands its own terms, buy the Das. For my own part, the Matias gradually won me over throughout the week+ of this comparison despite an initially less favorable reaction. I will, however, readily admit that one major factor of its appeal to me is pure nostalgia… It’s the most remarkable recreation I’ve tried of an original TRS-80 keyboard. That will make a lot of readers laugh, but it cuddles my heart like a warm blanket. If only it came with two 5 ¼” disk drives…
Monday, April 01, 2013
Composing vs Performing
I do a lot of very varied work in pipes - It helps keep me sane and enthused about what I'm doing, which can get a bit repetitive when you've been doing it this many years. The divergent ways that I will approach a project are as fundamentally different as the projects themselves, and I thought I'd write a little on the subject. For starters, the first question I ask myself is, "Is this going to be a composition or a performance?" I speak of this in the musical context and for me it is the key difference between whether I'm working on an original design of my own, or on an interpretation of a known classical shape.
Creating an original shape is, in essence, composing a piece of music - You've got as blank sheet and work from them, arranging elements in ways that tickle your fancy. When working from an existing design, however, as with the two pipes I'm using as examples below, I liken the creation experience more to a public performance of an existing composition. You have the music sheet already, you know what the melody is, you know what parts to put where, and it's all down to your own skill and personal interpretation as to how the playbook will be rendered for the audience.
This is the point where you have to make the interpretation your own, to make this specific individual performance something unique and distinct. For example, have a look at this bent billiard I've just completed:
I went in with the intent to make something simple and elegant - The classical bent billiard - a shape straight out of the "Ceci n'est pas une pipe" painting. It sounds like one might be locked in, but that's far from the case - There's actually a great deal of leeway for personal expression in the minute details of such a design. One of the most obvious is in curvature, especially shank and stem curvature.
If I were to try and list my own distinct "Talbert" hallmarks in design, one of the tops would be a freedom of flow from shank to stem to bit... Smooth curving lines that arc elegantly, without "humps" and sudden jarring curve changes from shank to stem. In silhouette, it should look like one single piece of material that's unfurling, without a clearcut deviation between stem and shank... unless that is the specific desire. Again, it's a matter of performance and mood, like an evening concert. It can be hypnotic and melodic, it can be hard and sharp, it can be raucous, it can be upbeat, it can be downbeat, and all of these renditions can be drawn from the same basic musical composition (or in our case, shape library).
For this piece, smooth elegance was the concept, to the point of being nearly sensual. On other pipes I might have gone for a tighter join of shank to bowl, but here, that was the opposite of what I was after - I wanted the bowl mass to transition smoothly from the thickest part of the bowl to the shank in a way that let the weight visually shift backward... One organic, unified piece of polished wood instead of distinct parts fitted together. I did not want the fingers to rest on an edge, anywhere on the pipe.
(For contrast, check out this recent bulldog, which is all about hard edges - Everything in it is beveled, planed, and tight of line. It's a brass ensemble to the billiard's soft woodwind.)
It's through the small touches like this, as well as finishes, that one maker defines his own aesthetic from another. While some might think that doing a classical shape would represent being "roped in" or limited in terms of creative expression, it can actually be quite liberating once you're technically proficient enough to really play with the basic elements of the design. Musically speaking, think of someone like Apocalyptica - A group of classically trained cellists who play Metallica songs. My own version of that sort of whimsy represents itself like this:
Yes, it's a bent billiard! In the "bones", per se, it is essentially the same pipe as the curvy example above, and yet the multitude of small differences make it an entirely different visual and tactile experience. Rather than sensual, I wanted its theme to be fat, chubby, and if I dare say so, jolly. The first billiard says, "Paint me like one of your French girls." The second billiard chortles by the Christmas stockings. Same maker, same functional underpinnings, but two entirely variant results with a distinct personality to each. Moreover, as individual, handmade items, it's a personality that can't be replicated exactly for future pipes.
...Which is not unlike an evening's live concert performance. You might hear the same notes being played similarly by the same group on another occasion, but you'll never hear that exact performance again.
Wednesday, January 16, 2013
Slice of Life
I thought I'd try something different - A little slice of first person life here...
In the workshop, I read over the year old commission order again. “A smooth green billiard, canted exactly 3 degrees forward, with a shank no longer than 2”” I sigh, leaning back in the chair and staring at the block I’ve picked out. It’s a beautiful piece, a tall slice of plateau from Italy, and it looks like it might be a decent candidate for Mr. Smooth Green Billiard’s order. I turn it over in my hands, examining the grain as I wet it and look for problem areas. Hmm, there’s a bit of a bald swirl there, but that’s low in the block, I can cut the bowl above it and it won’t disrupt the final grain. I run my fingers over it, feeling the wood and weighing it by hand. “Might be a good block”, I think, and then I’m off to the grinder to start some basic shaping. My headphones play me an odd selection of music, the opening track of “Porco Rosso”, the movie soundtrack by Joe Hisaishi. It’s a beautiful but varying album, with soaring heights and blues cafe sadness, and it always reminds me of our last few months in France. In my fingers, the block starts to take shape with the music. The gentle, balletic curve of the front of the bowl as it flares outward with the flow of the grain… A broad, wide-brimmed top that provides a mushroom-like rim to show off the tightly clustered bird’s-eye there… As the music dances, so does the shape, gaining a flippant shank curve that widens also, mirroring the bowl rim as it laughingly follows the grain of the block. “Tighter at the bowl join”, I think, rolling it around and cutting inwards, entirely focused on taking out everything that doesn’t need to be there.
Then, a flaw. There’s a split in the wood on the left side of the bowl - Just a tiny line, but there. I pull out the needle. It doesn’t go in. “Surface”, I hope, and grind a bit further in… the bowl reforms, moving from a round vase with a flared top to a tighter, more dramatic flare with a smaller bottom. The flaw is gone, I’ve cut past it. I’ll need to use a smaller bowl bit now, more tapered than I’d planned, but as I sit back to contemplate the design, I like it - The unexpected reshaping has actually made it a more dramatic form than I’d planned, and as usual, nature’s taken her own way to a design that I wouldn’t have thought of myself. The wide rim ripples organically and should look stunning when polished to a gloss. I move my fingertips over the surface, feeling the curves as gently as I’d caress a lover, picking out ripples and uneven spots. On the sanding discs, it tightens - Wood flattens and turns smooth as scratches and cuts vanish. I touch it constantly, going by instinct, doing my best to just let the pipe “be” what it wants to be, not what I force it to be.
Minutes pass…Hours. My music player has shuffled though my Miyazaki collection, reacquainting me with those spirited characters of strange lands. Kiki, Totoro, Chihiro, and I’m back to Porco Rosso again, the one I identify with the most in its wistful tale of alienation, love and acceptance. Finally I’m holding the pipe in my hands, nearly finished. The organic shape curls and twists with a slinky beauty. This one’s more catwalk model than kitchen homebody, I think. But it looks happy, and that’s what I was chasing - It looks just like what it wanted to be. In a few days it will be done, once the fine sanding and drilling and stem are finished, and I’ll be proud of it and proud to see it wing its way off into the world. I’m content knowing that somewhere out there, someone’s going to have a bad day years from now, and that evening he’ll come home and sit in his study and decompress from the stress, and he’s not going to pick up a cold iPad for comfort. He’ll pick up this pipe, and load it with his favorite tobacco, and light it, and then for an hour he’ll relax and let the weight of the day melt away, maybe with his favorite book. I’ve put a little good out into the world, and that makes me happy. It’s not a life saving good, it isn’t going to change the direction of rivers or forge amazing new advances in science, but it’s a tiny little good and that’s what I enjoy doing.
Then I notice a printed pipe order lying forgotten on the workbench and I curse and think that I’ve just proven yet again how much I utterly suck at making pipe commissions.
Subscribe to:
Posts (Atom)